Anise Pizzelle
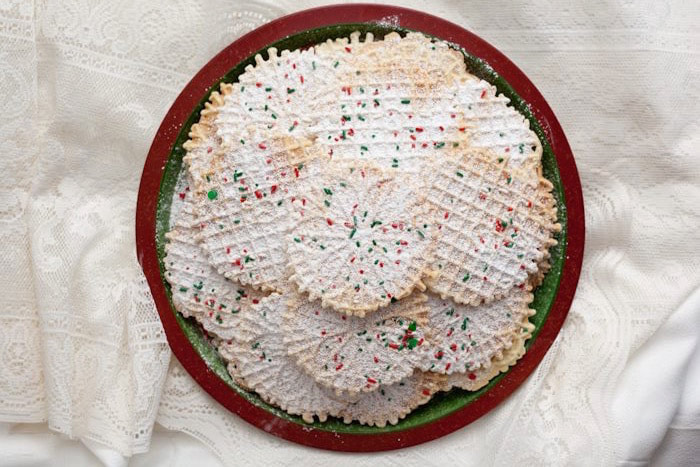
Whether it’s Christmas, Easter, Mother’s Day or just a plan old Sunday, pizzelle are always welcomed in my household. They are one of our favorite cookie, and the perfect after-dinner dessert when you want something light, not overly sweet, or too heavy. Pizzelle are a specialty of the Italian region of Abruzzo, and their popularity in the U.S. is strong! Traditionally, pizzelle are made with anise extract or anise oil, and that is my preferred flavor, but they can also be made with vanilla, lemon or orange extracts. Some folks dip pizzelle in chocolate, but I find that to be just a bit too much, and not very complimentary to the anise flavor. I like plating them on a lovely dish, then simply dusting them with a bit of confectionary sugar, and a few simple sprinkles here and there for decoration.
As far as the fat used in pizzelle, some recipes will call for oil, others margarine, lard or Crisco. But having tried other fats, I always return to unsalted butter. They crisp up nicely, don’t have an oily aftertaste, and cook to perfection in their special pizzelle press. I have a Cucina Pro Press, it’s many, many years old and has worked wonderfully all these years. You can find it on Amazon for under $50.00, and I surely have gotten my money’s worth!
This pizzelle recipe has been shared hundreds of times on my website, and is one of my most popular post on my blog. I hope you enjoy it, and be sure to make a batch or two this Christmas.
Anise Pizzelle
Yields: 34 – 38 Pizzelle
Ingredients
3 large eggs
3/4 cups granulated white sugar
1 stick (4 oz) unsalted butter, melted and cooled
2 teaspoons anise extract (or other preferred extract)
1 3/4 cups all-purpose flour
2 teaspoons baking powder
Instructions
- Preheat the pizzelle iron and heat according to instructions, usually several minutes. Spray both sides of the pizzelle maker with cooking spray. (Only spray the machine once, and not before press. This step is a safety measure to ensure they will release from the press.)
- In a large bowl, mix the eggs and sugar with an electric mixer on medium. Mix just until combined and light in color, about 2 minutes. Add the melted butter and extract and blend well for an additional minute.
- Sift the flour and slowly add the it, along with the baking powder, to the egg mixture. Mix until well combined. Do not over mix dough. The dough will be rather stiff.
- Drop a rounded teaspoon of dough on each side of the the pizzelle iron, locking the press with the lock on the machine. This ensures thin, crispy pizzelle.
- Depending on your iron, it will take anywhere from 30 – 60 seconds to cook through. The pizzelle will be cooked when they turn golden in color. (Some machines come with a timer.) The pizzelle will be a bit soft when removed them from the press, they will crisp up as they cool.
- Cool on clean paper towels or clean kitchen towel. Dust with confectionary sugar, plate and serve.
Notes
I use cooking spray for the first two pizzelle only, just to make sure they do not stick. You do not need to spray for each pizzelle pair, just at the beginning. Each iron is different. Do not be disappointed if the first few do not come out just right. It might take a few tries. Some of the dough might spill to the outside if you are using too much, or you might not get a full pizzella if you are using too little dough. Again, it might take a few tries to get them just right, but practice makes perfect! They are worth the effort!
Recipe Updated: December 16, 2024
Leave a Reply

What to Pack for Italy
Cosa Mettere in Valigia per l'Italia
Everyone is always asking me what they should pack for Italy,
so I’ve created a quick reference guide that you can use for your next trip.
Hint: You don’t need nearly as much as you think you do!
15 Comments
salted or unsalted butter
Unsalted, my apologies for not clarifying!
Thank you, much respect
My mother handed down her recipe to me many many years ago. It is like Italian wedding soup recipes, so many variations. She used twice the flour and salted butter. I imagine our pizzelles are more dense. I love mine but I’m going to try your recipe (think they will turn out much like my aunt’s, thin, light, crispy). Thanks for sharing.
Yes Denise, these are definitely thin and crispy! So good with tea or coffee! Enjoy and let me know how they turn out!
Will do! Going to make them with lemon for Easter and looking forward to the powered sugar.
Enjoy!
Did you mix the sprinkles in the dough before baking?
No, I just sprinkle some on top of the platter once plated. Just for decorations and color.
Thank you for the recipe my mother made them withe machine. My mother in law had her own iron made in Italy with her initials on each puzzle. They were thick and took a lot of time to make. I am looking forward to try your recipe.
These are thin and crisp. You’ll love them!
How important is it to use a sifter for the flour? I don’t have one.
Hi Deborah, it’s not really needed, you can get away without it. Just run a whisk around the flour to make sure you don’t have any lumps.
Anise is my favorite flavor, can’t get enough. I just purchased a machine of my own because I can’t always find at the store. Thank you so much for your recipe can’t wait to try. Let you know how they turn out
This is a great recipe, you will love it!